Wednesday, February 12, 2014
Payday

I made it back to Carltons before class today to pick up some ebony to correct that glue-up SNAFU discussed earlier. Now, Ive dealt with teak before and I thought that was some pretty expensive stuff. If I recall correctly it was somewhere in the neighborhood of $9.00/bd ft. Thats pretty high. Ive dealt with mahogany as well and that was up there too. I figured Id get about 1.5 bd ft. of ebony to be on the safe side for this inlay operation and maybe pay $15-20. So as Richard and I were sorting through different pieces--stunning stuff--he looked at me and said, "You know this stuff is $80/bd ft." "Eight?" "No, eighty." "Ooookay then. Got any good substitutes?"
So picture a piece of wood one foot by one foot and an inch thick...thats $80.
He showed me a close relative to the pure black ebony called mun ebony (diospyros mun). Its ink black with thick bands of white running through it and, like black ebony, is as heavy as lead. Its also half the price of the black ebony which still brings it to four times as expensive as the previous most-expensive-wood-Ive-bought. Heres The Precious:

Yep, a $60 piece of wood.
Fortunately Im allowed to return what I dont use. Isnt woodworking a great little community? Except it takes all your money.
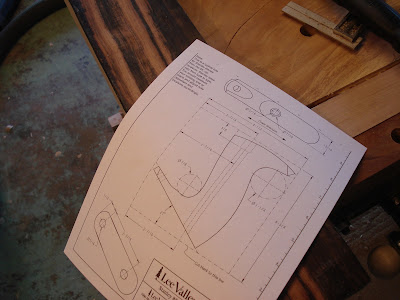
I had a thought as I was driving home: remember my jointer that came with the broken tote that I glued back together? Well, the glued joint isnt exactly seamless and doesnt suit me well. I recalled seeing that Lee Valley has produced free templates for making reproductions of Stanley totes. Interesting business move if you think about it:
Lee Valley: "So instead of buying our stuff, you go out and buy someone elses stuff and then you come to us looking for free help to repair their stuff. Oh, okay...well help you out." Does this not reinforce every Canadian stereotype you have, good and bad?
The thought formed: why dont I make my own tote out of ebony with white racing stripes? I think my workbench has a maiden project:
But lets not get ahead of ourselves here...theres a bench to finish. The first step in exotic wood prep is often to scrape the wax off:
 They coat the edges of high-dollar hardwoods with wax to prevent moisture from escaping from the sides. But John, dont you want dry wood? Yes, but you want moisture to escape uniformly through the face of a board so that you dont get differential contraction which will put cracks in the piece. I then jointed an edge...

Then I tapered the bottom of the strips with the blockplane so that they could be wedged into the groove:


Wait for it...
After:

Lee Valley: "So instead of buying our stuff, you go out and buy someone elses stuff and then you come to us looking for free help to repair their stuff. Oh, okay...well help you out." Does this not reinforce every Canadian stereotype you have, good and bad?
The thought formed: why dont I make my own tote out of ebony with white racing stripes? I think my workbench has a maiden project:
But lets not get ahead of ourselves here...theres a bench to finish. The first step in exotic wood prep is often to scrape the wax off:
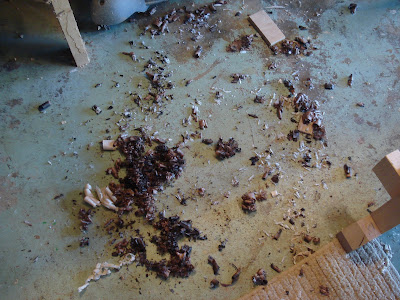
Expensive shavings
...and cut some strips on the bandsaw:
Then I tapered the bottom of the strips with the blockplane so that they could be wedged into the groove:
Ebony dust is nasty stuff
I think that the effort was worth it:
That was good work for the day but I had some more time on my hands so I took out the router and rounded-over the tool tray edges:
If you look closely at the previous picture you can also see that I have removed the top half of the ends of the tool tray. I did this so that I can use the workbench to hold sheet goods (plywood) while I cut it with a circular saw. I just line the cut up over the tool tray, set the saw depth to just barely go through the wood, and saw away. I removed those chucks from the ends so that my cuts wouldnt be confined to the length of the workbench. I think its a slick idea.
Id been thinking about finishes for a long time and finally settled on boiled linseed oil. Tonight was the night.
Before:
Wait for it...
After:
Check out how the oil darkens the endgrain and emphasizes those ostrichtails. Pretty sweet. Makes me wanna clap my hands...
Nice chickens there.

Subscribe to:
Post Comments (Atom)
No comments:
Post a Comment